ALTERNATORS ML Rampage/Armada Wheeljack
Micron Legend RAMPAGE or Armada Wheeljack
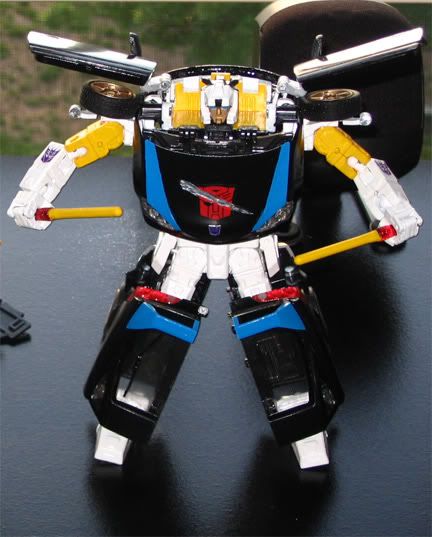
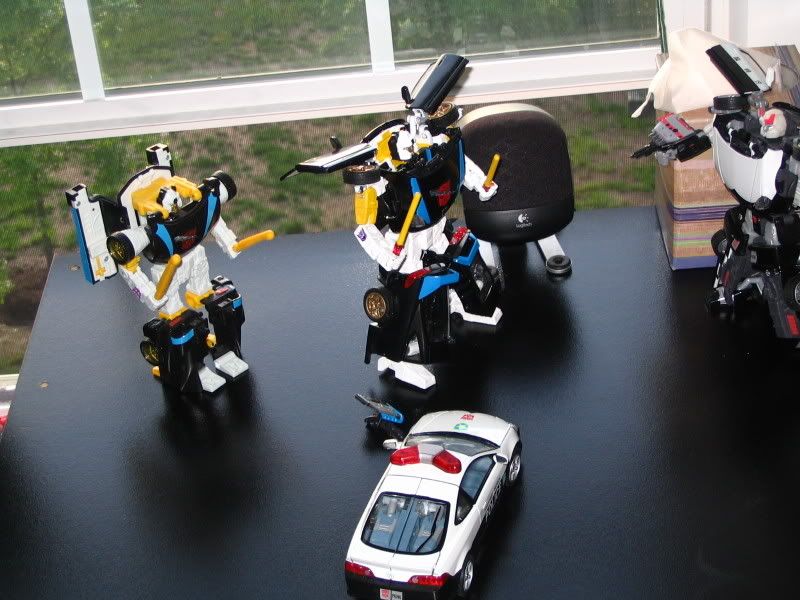
This is actually my very first kitbash ever and overall I'm very pleased with it, but there are several things I can improve next time thanks to all I learned in the process. I choose to model this figure off of Takara's version of armada wheeljack or simply Micron Legend Rampage.
I hope Squall42080 doesn't think I'm trying to copy his alt-armada concept because I told him of my plans of this guy a long time ago and he said he would be doing one as well someday, I just thought his would be ready by now. Like him, I really enjoyed armada and some of the characters I think look great as alts. Oh and by the way, Squall42080 does absolutely amazing work so if you haven't seen his armada-alt customs, you are missing something truely special.
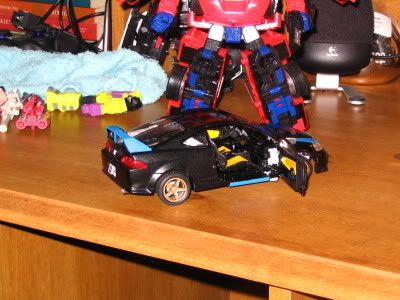
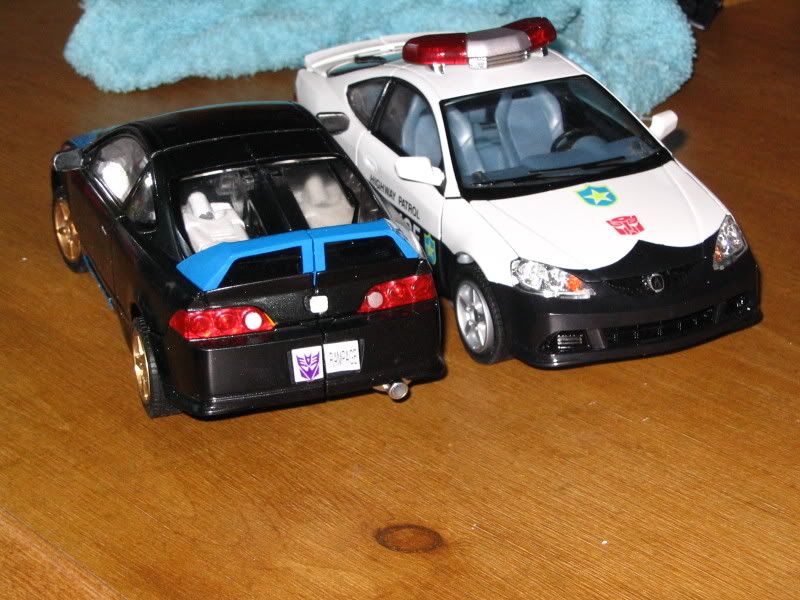
Here's what I did to make this guy: I took everything apart within removing pins. I stripped as much paint off of an alternators prowl as I could before I painted it. I could have gone the easy route and just left prowl's black plastic alone, but I came across Tamiya Metallic Black spray paint. WOW! You can't tell from the pics, but in person he looks so much better painted metallic black. Since a lot of the plastic is black, I didn't need much paint. Combined that with Tamiya Clear Paint (clearcoat) on the body and the body doesn't chip! I also took the spoiler from a BT Prowl because it more resembled the spoiler on wheeljack/rampage. When removing the lightbar, I used Tamiya Modeling Putty to fill in the holes. This seemed to work well but after I let it dry and then painted it, the putty would settle even further down the hole (or compress) so I still have small depressions where the lightbar was. I may come back to fix this sometime, but in bot mode it doesn't matter. Thanks to a small sacrifice from another alt prowl, this figure gets not one, but two whooping-sticks. The logos come by way of Reprolabels. I used their "clear backing" logos and they RULE! If you buy logos from them, I suggest that style. However, I did use a silver backed logo on his chest for the decepticon badge. By using the silver backed one here, it looks kinda like a hood ornament/badge. I tried the clear backing one here but you just couldn't see it against the black.
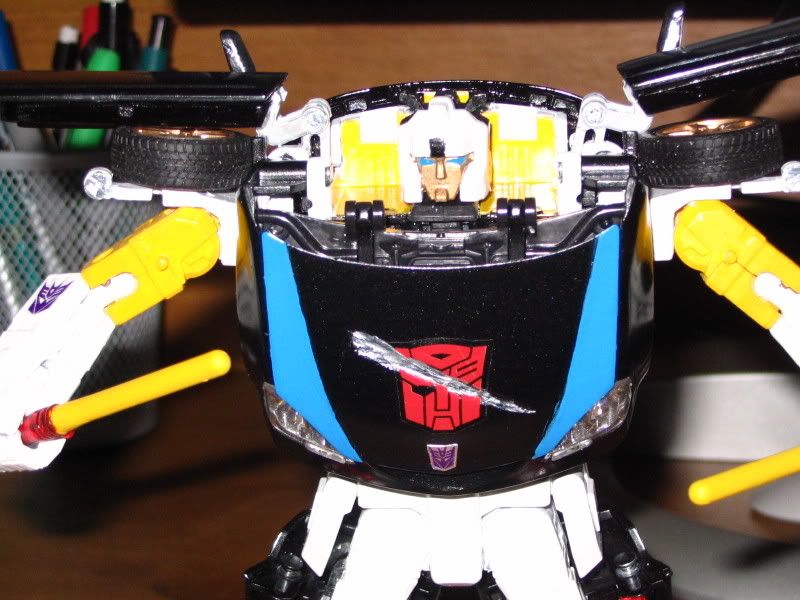
As you can tell by the chest, I did remove part of the autobot logo for the scar. The scar is not just silver paint. I used a dremmel on it to dig into the plastic and really rough it up to give more of the appearance of a scar in person, much like a real scar. I toyed with the idea of cutting a hole to expose the engine, but I decided it may look bad and actually is kinda stupid. I can understand having a battle scar or emotional scar like that kept around, but the orignal toy didn't just have a scar, he had a HOLE. I think it made more sense to show the hood has having sealed up but leaving something that looks more like a real scar.
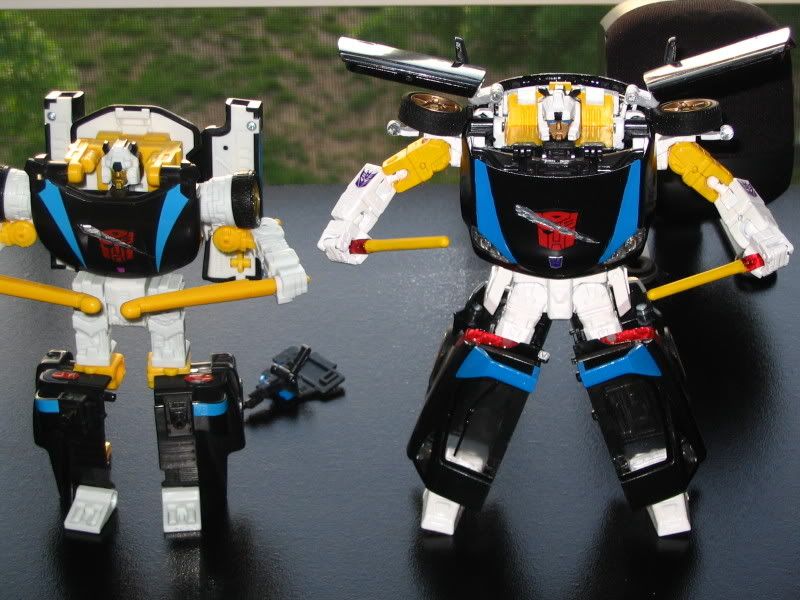
The head comes from Bumblebee1251 of Transtopia. He casted an alternators meister head and sent me two copies. The heads turned out ok, but it was good enough to use, and much cheaper than buying a meister to chop off its head. With some use of a dremmel, lots of sanding, chiselling out the top of the head to give the appearance of horns, and carefully painting it, I think I have a fairly convincing armada wheeljack head. I thought about using an armada wheeljack head, but it would be a bit too small and messy to remove and convert for an alternator body.
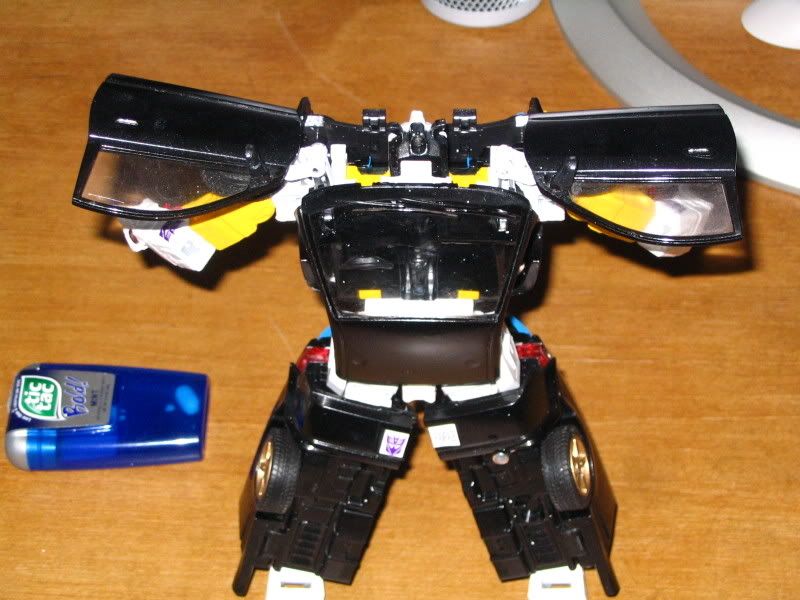
Some other thoughts: Taking the time to mask off parts with modeling masking tape really helps. This way I didn't get any paint over the windows or the black trim around them. I Used tamiya acryllics: Flat Yellow, Flat White, White Primer (spray), Pure White (Spray), Metallic Black (spray), Flat Black (for the interior), and Sky Blue (a perfect match of the blue on the original armada figure). For the wheels and face, I used Testors Gold Enamel. My acryllic gold was just too light of a color to use. Oh, and everything I painted got a Clear Coat treatment to help from chipping. Not only that, but it helps a lot of the paint to shine too!
The one area I would love to redo in the future are the legs and arms that are white. I just couldn't get my paints to adhere well to those regions. Consequently, I had stripped the paint several times but that only made things worse. Up close, the arms look fine but the thighs look messy (only the white part, not the yellow). If Hasbro ever gives us a repaint with White Parts, I will be buying a spare to swap some extra parts on this figure. Also, if anyone repaints a prowl, do not paint the balljoints, the elbows, or shoulders as any paint in this high friction parts will come right off, just as is happing in those places on mine.
If there are any questions, please feel free to ask. Critism is welcome, but remember this is my very first kitbash so please keep harsh words to a minimum and kind words to a maximum.


For more pictures, you can see all of them here: http://s13.photobucket.com/albums/a286/ ... t_rampage/
This is actually my very first kitbash ever and overall I'm very pleased with it, but there are several things I can improve next time thanks to all I learned in the process. I choose to model this figure off of Takara's version of armada wheeljack or simply Micron Legend Rampage.
I hope Squall42080 doesn't think I'm trying to copy his alt-armada concept because I told him of my plans of this guy a long time ago and he said he would be doing one as well someday, I just thought his would be ready by now. Like him, I really enjoyed armada and some of the characters I think look great as alts. Oh and by the way, Squall42080 does absolutely amazing work so if you haven't seen his armada-alt customs, you are missing something truely special.
Here's what I did to make this guy: I took everything apart within removing pins. I stripped as much paint off of an alternators prowl as I could before I painted it. I could have gone the easy route and just left prowl's black plastic alone, but I came across Tamiya Metallic Black spray paint. WOW! You can't tell from the pics, but in person he looks so much better painted metallic black. Since a lot of the plastic is black, I didn't need much paint. Combined that with Tamiya Clear Paint (clearcoat) on the body and the body doesn't chip! I also took the spoiler from a BT Prowl because it more resembled the spoiler on wheeljack/rampage. When removing the lightbar, I used Tamiya Modeling Putty to fill in the holes. This seemed to work well but after I let it dry and then painted it, the putty would settle even further down the hole (or compress) so I still have small depressions where the lightbar was. I may come back to fix this sometime, but in bot mode it doesn't matter. Thanks to a small sacrifice from another alt prowl, this figure gets not one, but two whooping-sticks. The logos come by way of Reprolabels. I used their "clear backing" logos and they RULE! If you buy logos from them, I suggest that style. However, I did use a silver backed logo on his chest for the decepticon badge. By using the silver backed one here, it looks kinda like a hood ornament/badge. I tried the clear backing one here but you just couldn't see it against the black.
As you can tell by the chest, I did remove part of the autobot logo for the scar. The scar is not just silver paint. I used a dremmel on it to dig into the plastic and really rough it up to give more of the appearance of a scar in person, much like a real scar. I toyed with the idea of cutting a hole to expose the engine, but I decided it may look bad and actually is kinda stupid. I can understand having a battle scar or emotional scar like that kept around, but the orignal toy didn't just have a scar, he had a HOLE. I think it made more sense to show the hood has having sealed up but leaving something that looks more like a real scar.
The head comes from Bumblebee1251 of Transtopia. He casted an alternators meister head and sent me two copies. The heads turned out ok, but it was good enough to use, and much cheaper than buying a meister to chop off its head. With some use of a dremmel, lots of sanding, chiselling out the top of the head to give the appearance of horns, and carefully painting it, I think I have a fairly convincing armada wheeljack head. I thought about using an armada wheeljack head, but it would be a bit too small and messy to remove and convert for an alternator body.
Some other thoughts: Taking the time to mask off parts with modeling masking tape really helps. This way I didn't get any paint over the windows or the black trim around them. I Used tamiya acryllics: Flat Yellow, Flat White, White Primer (spray), Pure White (Spray), Metallic Black (spray), Flat Black (for the interior), and Sky Blue (a perfect match of the blue on the original armada figure). For the wheels and face, I used Testors Gold Enamel. My acryllic gold was just too light of a color to use. Oh, and everything I painted got a Clear Coat treatment to help from chipping. Not only that, but it helps a lot of the paint to shine too!
The one area I would love to redo in the future are the legs and arms that are white. I just couldn't get my paints to adhere well to those regions. Consequently, I had stripped the paint several times but that only made things worse. Up close, the arms look fine but the thighs look messy (only the white part, not the yellow). If Hasbro ever gives us a repaint with White Parts, I will be buying a spare to swap some extra parts on this figure. Also, if anyone repaints a prowl, do not paint the balljoints, the elbows, or shoulders as any paint in this high friction parts will come right off, just as is happing in those places on mine.
If there are any questions, please feel free to ask. Critism is welcome, but remember this is my very first kitbash so please keep harsh words to a minimum and kind words to a maximum.
For more pictures, you can see all of them here: http://s13.photobucket.com/albums/a286/ ... t_rampage/