>
>
>

New to the Forum - Pairadocs Design Lab - with Blackout Custom!

Post all your customized Transformers here. Whether it's a small mod or a true kitbash, we'd love to see it!

New to the Forum - Pairadocs Design Lab - with Blackout Custom!

Postby pairadocs » Wed Aug 08, 2007 2:16 pm

Hello everyone!

I've been customizing toys and figures for several years now (primarily I've done a lot of Spawn and original customs, but then branched out into Marvel... and most recently, Transformers.)

I used to do Gundam models a lot back in the day, and now I'm hooked on Transformers customs. The other forums I'm in aren't really Transformers focused, so I've been out recently looking for TF forums... and this seems to be the "rebelscum" of TF sites... in other words, pretty dang awesome.

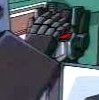
Anyhow, I finished a Blackout custom last week, and thought I'd share it with you all. Let me know what you think - I love getting feedback bad and good!

He's a COMPLETE repaint - I painted the base with a military blue-grey, and then added weathering effects. I also filled in all his joints, where the screws were exposed, etc.

Thanks for looking!


Image

Image

Image

Image

Image

Image

Image

Image

Image

Image

Image

Image

Image

Image

You can check out my Flickr gallery of my other stuff here: http://www.flickr.com/photos/pairadocs/sets/72157594541503260 (if you so desire...)

And yes, he's on the bay now if you're interested (since everyone else is doing it) :) http://cgi.ebay.com/ws/eBayISAPI.dll?ViewItem&rd=1&item=320144707258
pairadocs
Mini-Con
Posts: 32
Joined: Wed Aug 08, 2007 1:59 pm

Postby Sherade » Wed Aug 08, 2007 2:21 pm

All I can say is wow. You're insanely good. Blackout looks cool as anything, with the scorch and scrapes, and mini scopry looks killer with all that detail. The pics are awesome two. Lighting and all. So, what else are we gonna see?
Image
previousPrime wrote:The clock guy has impressive testicles.
Sherade
City Commander
Posts: 3426
News Credits: 1
Joined: Fri Oct 06, 2006 7:09 pm
Location: Baltimore, MD, USA

Postby Briggs » Wed Aug 08, 2007 5:51 pm

HOLY CRAP!!!!
Briggs
Headmaster
Posts: 1046
News Credits: 4
Joined: Tue May 22, 2007 1:00 pm

Postby Sparky » Wed Aug 08, 2007 5:52 pm

Awshome job there.
Sparky
Minibot
Posts: 105
Joined: Tue Jul 03, 2007 3:01 pm

Postby Trelve » Wed Aug 08, 2007 6:25 pm

How long did it take you to complete this?
Trelve
Micromaster
Posts: 79
Joined: Tue Jul 31, 2007 6:00 pm

Postby pairadocs » Wed Aug 08, 2007 8:10 pm

Thanks guys!

As far as time... I don't know for sure... I put a couple hours in a night for about a week... so I'd say between 15-20 hours total?

As far as what else is coming up... more movie TF for now, plus some other stuff (non-TF related.) Stay tuned! :)
pairadocs
Mini-Con
Posts: 32
Joined: Wed Aug 08, 2007 1:59 pm

Postby Wheeljack-S70 » Wed Aug 08, 2007 8:59 pm

another awesome blackout. effing great!
and welcome. nice to have you in the mix.
Image
Wheeljack-S70
Vehicon
Posts: 342
News Credits: 1
Joined: Sat Apr 21, 2007 9:43 am

Postby Ramrider » Wed Aug 08, 2007 9:14 pm

Wow, that is a piece of work. I love the way the detailing's very subtle, but so effective. And filling in the screwholes makes it look so much cleaner. I just hope you don't wind up regretting that further down the line... :P
Ramrider
Gestalt
Posts: 2691
Joined: Sun Jul 13, 2003 12:04 pm

Postby pairadocs » Wed Aug 08, 2007 9:36 pm

Thanks again for the warm welcome everyone!

As for regretting filling in the holes... never. Especially since I'm selling this one and won't have to worry about it. :)

Hehe... seriously though, it's something I do with all my customs (screws distract me and make it harder to pretend they're real when I play with them.) :) It has proven to be a serious issue though for a few when I had a minor "shelf-diving" incident that left a few plastic injuries... I just ended up using a small tip on the dremel to remove the apoxie... and when I hit metal, I stopped and used a screwdriver to dig the rest out, and then unscrewed it. All part of the "surgery" to repair.

:)
pairadocs
Mini-Con
Posts: 32
Joined: Wed Aug 08, 2007 1:59 pm

Postby Malicron » Wed Aug 08, 2007 9:46 pm

Motto: "We're all going to die... You go first."
Weapon: Energo-Sword
It's increadable how much differance a paint job makes. He looks like he did in the movie.

Great work, looking forward to seeing more of you in the future. :D
Image
"Chaos, panic, and disorder; My work here is done."
User avatar
Malicron
Gestalt
Posts: 2924
Joined: Tue Jul 24, 2007 6:06 pm
Location: I could tell you, but then... Oh hell, you know the rest.
Strength: 10
Intelligence: 10+
Speed: 5
Endurance: 8
Rank: 9
Courage: 10
Firepower: 7
Skill: 10

Postby Fury » Thu Aug 09, 2007 2:10 am

That's very good. Transforming a crappy transformer figure into a little masterpiece... Nice. I have to do that with mine now. Saw too many good customs, got me inspired. What paint are you using ?

Oh and judging by those pics, I assume that you were not aware of the pad positioning trick ? Would make the figure look even better...

Edit: Just looked at you gallery. You're one talented person... Now I just want to do the same with my figures.
Fury
Minibot
Posts: 133
News Credits: 7
Joined: Sun Jul 22, 2007 12:56 am

Postby Skullgrin140 » Thu Aug 09, 2007 3:48 am

WOW! Love the recolour man! I especially love what you did with little scorpy ^^
Image
Skullgrin140
Brainmaster
Posts: 1375
Joined: Wed Oct 20, 2004 11:18 am
Location: Chelmsford, United Kingdom

COOL

Postby Ash » Thu Aug 09, 2007 6:12 am

You know I think This guy will do Even Better soon!!

COCOCOCLLLL Cool!! just plain Ice cool!!


_____________________________________________________________
Have you seen my customs? Click the link!!
http://www.seibertron.com/forums/viewto ... 13128&sid=
Ash
Vehicon
Posts: 303
News Credits: 1
Joined: Sat May 12, 2007 6:42 am


Return to Customizations

Patreon
Charge Our Energon Reserves. Join the Seibertron Elite.
Support SEIBERTRON™