>
>
>

WIP-My First Repaint-Alt Trailbreaker

Post all your customized Transformers here. Whether it's a small mod or a true kitbash, we'd love to see it!

WIP-My First Repaint-Alt Trailbreaker

Postby NeilJam » Thu Aug 10, 2006 5:33 pm

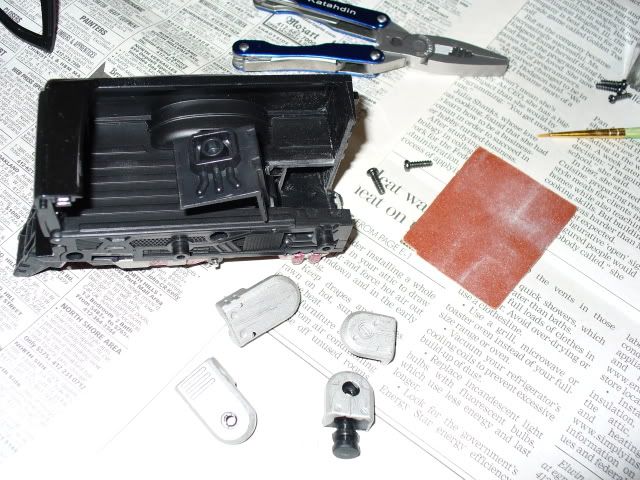
Finally got started on my first repaint this week. Making a Trailbreaker Alternator by modifying Nemesis Prime. I know it's a simple project compared to many I've seen, but it's my first shot at this:

Took a head from a cheap Swindle:
Image

Painted upper legs and sanded the bed around where the go in:
Image

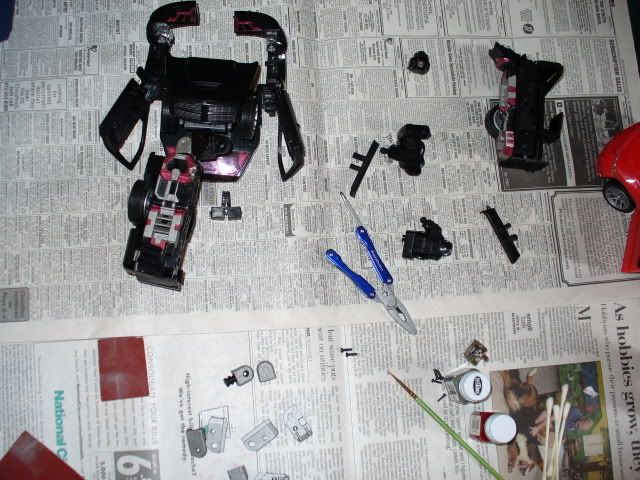
Work area:
Image

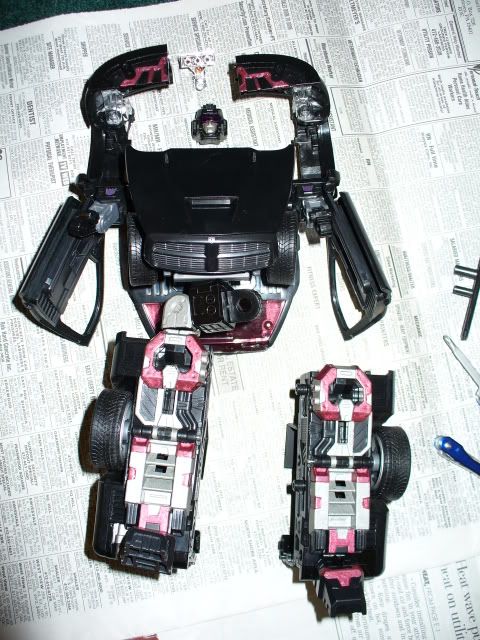
Sneak peak (arms are drying):
Image

I was surprised at how close the red paint I got is to the red tint in the windows. Still have to figure out how I'll get Swindle's head on this. I've read about building up the post with super glue and/or clear nail polish but haven't tried it yet. Also saw something about taking the post from one and putting it on another but don't remember what all that involved.
NeilJam
Mini-Con
Posts: 5
Joined: Sun Jul 16, 2006 10:41 am

Postby Boggs6ft7 » Thu Aug 10, 2006 5:50 pm

Looks good so far, although I'm sad your modding your Nemesis Prime, I don't have one yet. Or a regular Prime for that matter.
Boggs6ft7
Mini-Con
Posts: 21
Joined: Mon Aug 07, 2006 1:31 am
Location: Southern Indiana

Postby plowking » Thu Aug 10, 2006 6:38 pm

Looks good! I like the way ou applied the paint app details to the legs...

As far as swapping out the neck joint...on Prime/Nemy Prime, the neck joint is held in by a pin kinda like the wheel pin. You have to pretty much dis-assemble the upper body (mainly the dash board section) just to get to it, then you'll need a soldering iron to heat up the pin to get it out.
Image
plowking
Micromaster
Posts: 92
Joined: Sat Jun 04, 2005 1:18 pm

Postby NeilJam » Thu Aug 10, 2006 9:52 pm

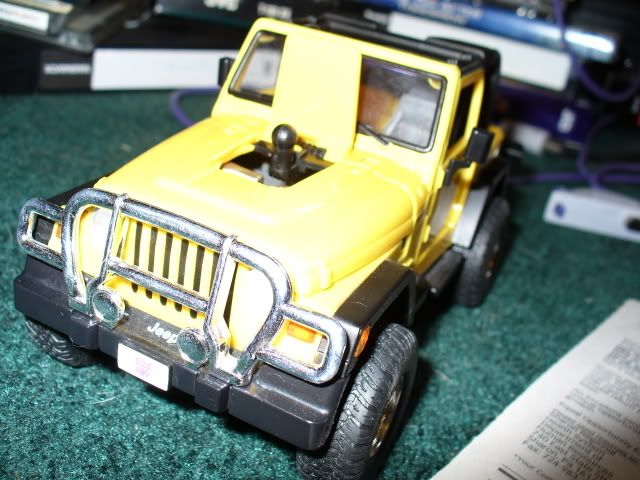
Alpha_&_Omega wrote:pardon me sir, but why the hell are you modding an expencive and rater figure like that when you can get the same figure (in a red paint job) for $20? dye the red palstic black if your that afraid of chipping. or if you don't want the hassel of hand painting, use spray paint. I really hope it turns out great, but i'm still looking for a N. Prime for my own collection for a decent price.


A Few reasons I used this mold:

1. It was already the right color so I don't have to paint or dye it. I'm sure Optimus wouldn't look nearly as good if I tried to paint him (this is my first project, so I'm starting small) I would also have to get the Dodge and Viper logos back on if I painted it.

2. The Nemesis Prime mold seems better build to me. Right out of the package the steering worked better than OP's

3. If this works out, I have other plans for Optimus. I may use him for a partial reshell.


Hopefully you will be able to find a NP for not too much. Paid $50 including shipping from HK just before the HTS fiasco.
NeilJam
Mini-Con
Posts: 5
Joined: Sun Jul 16, 2006 10:41 am

Postby johndillinga2003 » Fri Aug 11, 2006 8:17 am

Well besides the insanity of using Nemmy for a custom I might be able to help with the balljoint problem.
Go to your local Home depot and in the plumbers section they sell a 7 minute 2 part harding putty its in a 10 inch clear plastic tube with a red top forgot the name at the moment (The stuff is great) and a pair of rubber gloves.
pull off a small bit of the putty and mix it in your hands till its a uniform grey color apply a small amount to the balljoint (Round part only)completely and let it dry then try fitting the head onto the the new surface (sand if needed) and your done. When the stuff drys its like steel so you won't have to worry after...
johndillinga2003
Fuzor
Posts: 210
Joined: Fri May 23, 2003 6:21 pm

Postby gawd6sic6 » Fri Aug 11, 2006 11:20 am

John Dillinga wrote:Well besides the insanity of using Nemmy for a custom I might be able to help with the balljoint problem.
Go to your local Home depot and in the plumbers section they sell a 7 minute 2 part harding putty its in a 10 inch clear plastic tube with a red top forgot the name at the moment (The stuff is great) and a pair of rubber gloves.
pull off a small bit of the putty and mix it in your hands till its a uniform grey color apply a small amount to the balljoint (Round part only)completely and let it dry then try fitting the head onto the the new surface (sand if needed) and your done. When the stuff drys its like steel so you won't have to worry after...


oatley epoxy putty.. youll find it near all the pvc pipe.. its usually on an end cap with all the glue... i use it for all scratchbuild stuff... works awesome but smells like 7 different kinds of ass... but its awesome. $3.99 for the tube..
gawd6sic6
Targetmaster
Posts: 677
Joined: Fri Jul 06, 2007 9:20 pm
Location: Lancaster Ohio

Swindle head

Postby tlalr1 » Fri Aug 11, 2006 10:00 pm

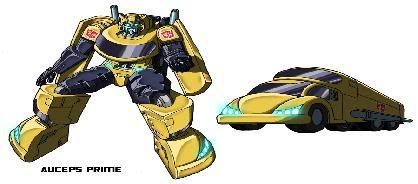
Here's an idea I've allready done this so it will work. No need to modify the balljoint on Prime. The base of Swindle's head is big enough, all you have to do is notch a small hole in the bottom of head with exacto knife and attach the head. There will not be much articulation in movement of head but it works fine. Much like Prime's head movement allready.
Till All Are One!!!
Image
tlalr1
Mini-Con
Posts: 13
Joined: Sun Jul 30, 2006 9:39 am
Location: Houston, Texas

Postby johndillinga2003 » Sat Aug 12, 2006 8:22 am

gawd6sic6 wrote:
John Dillinga wrote:Well besides the insanity of using Nemmy for a custom I might be able to help with the balljoint problem.
Go to your local Home depot and in the plumbers section they sell a 7 minute 2 part harding putty its in a 10 inch clear plastic tube with a red top forgot the name at the moment (The stuff is great) and a pair of rubber gloves.
pull off a small bit of the putty and mix it in your hands till its a uniform grey color apply a small amount to the balljoint (Round part only)completely and let it dry then try fitting the head onto the the new surface (sand if needed) and your done. When the stuff drys its like steel so you won't have to worry after...


oatley epoxy putty.. youll find it near all the pvc pipe.. its usually on an end cap with all the glue... i use it for all scratchbuild stuff... works awesome but smells like 7 different kinds of ass... but its awesome. $3.99 for the tube..


Dude you paid 3.99???

I got ripped off with 7.99... :oops:
johndillinga2003
Fuzor
Posts: 210
Joined: Fri May 23, 2003 6:21 pm

Postby gawd6sic6 » Sat Aug 12, 2006 10:57 am

John Dillinga wrote:
gawd6sic6 wrote:
John Dillinga wrote:Well besides the insanity of using Nemmy for a custom I might be able to help with the balljoint problem.
Go to your local Home depot and in the plumbers section they sell a 7 minute 2 part harding putty its in a 10 inch clear plastic tube with a red top forgot the name at the moment (The stuff is great) and a pair of rubber gloves.
pull off a small bit of the putty and mix it in your hands till its a uniform grey color apply a small amount to the balljoint (Round part only)completely and let it dry then try fitting the head onto the the new surface (sand if needed) and your done. When the stuff drys its like steel so you won't have to worry after...


oatley epoxy putty.. youll find it near all the pvc pipe.. its usually on an end cap with all the glue... i use it for all scratchbuild stuff... works awesome but smells like 7 different kinds of ass... but its awesome. $3.99 for the tube..


Dude you paid 3.99???

I got ripped off with 7.99... :oops:


lowes homie lowes.. lol.. plus youre in new york. im in ohio.. cigs there $7.. here $4.... a pepsi is what now $2 a bottle.. here $1.... sometimes ohio is like its own little world...
gawd6sic6
Targetmaster
Posts: 677
Joined: Fri Jul 06, 2007 9:20 pm
Location: Lancaster Ohio


Return to Customizations

Patreon
Charge Our Energon Reserves. Join the Seibertron Elite.
Support SEIBERTRON™