Okay folks, more updates...
The wooden mold (buck) for the combat mech canopy:

Molding the canopy (plexiglas used here instead of styrene); I used the burner from an electric stove to soften the plexi in order to "smash" it down on the wooden buck. I used oven mits to hold the plexi while pulling down over the wooden mold:

Removal from mold and trimming:

Rough fitting to combat mech:


Beginning of framing on canopy:

Then I did some more work:

I was going to paint this, but I got sidetracked on a missing detail: the RADAR dish!
Sooo....


I scratched it together from styrene pieces, including one I cut roughly into round shape, screwed to the cutting mandrel of my Dremel tool, and shaped using a file and stone.
I double-jointed it so it would fold down neatly and not hit the canopy I just made.
Then, paintwork:


Paints applied, and the cockpit canopy has a
smoked amber transparent finish now. I was undecided on which to do, so I did
both!

ell, with everything else being modified and upgraded on MP-01, I thought it was high time to do likewise to the trailer itself.
This is it just after I stripped down most of the details, but before I took off the old Combat Droid:

Yeah, it was a
royal mess.
What I did next was to cut a piece of sheeting from a fluorescent light out, and use the "diamond pattern" to my advantage:

I then cut out the blue outlined areas, and glued it into place:

(and used some carbonated refreshment to hold it in place. Were I to be legitimate "G1", i should have used Pepsi!)
New piece in place:

The trailer pretty well scraped out, with new plastic in place:

I then took some VERY heavy styrene sheet (think "PLANK"), and cut it into sections that when assembled, would look like panel lines in the walls:

The sections during "rough fit" in the trailer:

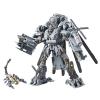
Changing gears for a bit, I took some time to router out the cockpit of the artillery mech even further:

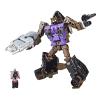
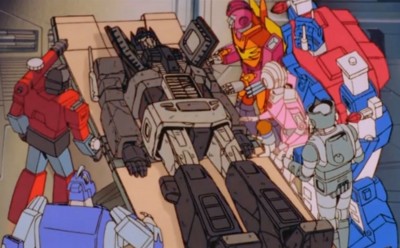
And that was to make room for this figure, whom I was able to rescue with some spare parts and a bit of glue:

Moving right along with the trailer mods, I began the detailing on the internal panels. I started by carving panel lines and laying very thin styrene over the panels, creating a recessed effect. The process is shown visually as follows:
1) The panel is detailed, and sanded. This pic shows the panel after the detailing, but before the sanding process. A cutout for the hings joint for the dual laser emplacement has been cut into the panel:

2) After some sanding, I painted the piece in black spray paint. This is so I can build the metal color on top of it. It shows the pits, ripples and scratches, but those are removed later with some wet sanding:

3) After some wet-sanding, I began building the metal color on the piece by dry-brushing it in multiple directions. I didn't want a smooth, shiny silver piece, but metal with a bit of texture:

4) Continuing the painting process, where more paint is drybrushed on; I wanted to establish a "grain" for the surface's metal look:

5) I continued on, until the paint was nearly complete. This pic doesn't show it well, but I managed to get a "brushed metal" look to it with the technique:

6) Beginning of the panel-line details:

7) More detail work, largely with a fine brush and black ink:


In place:

I repeated the steps for the opposite panel; I'll just post those pics by themselves so you can see the progression (the shots turn a couple of times, be advised):


And this is both panels in place on the trailer:

Another shot (more from the side):

The hinges will be covered with styrene, while the remaining areas of the "floor" on the trailer halves will be filled in. The "black areas" are going to be done as a surprise for everyone here (not saying just yet!), while the inside of the "roof" and inside front of the trailer walls will also be re-covered with sheet styrene. The, re-attaching the artillery mech and cleaning up the gun mount for Roller I'm probably goung to develop an all-new mounting!).
After all that, I'll address the outside of the trailer; I just need to get my hands on two REALLY big Autobot symbols (larger than the ones on Prime's shoulder!). The blue striping and silver on the sides I'm going to redo using foil tape and paint.
Stay tuned gang, I've got surprises up my sleeve...