
Transformers Workshop (Maintenance & Repair)
Re: Transformers Workshop (Maintenance & Repair)
Posted by Mr_Wayne Wed Jan 09, 2013 10:03 pm
- Mr_Wayne
- Micromaster
- Posts: 50
- Joined: Thu Dec 01, 2011 8:30 pm
Re: Transformers Workshop (Maintenance & Repair)
Posted by evers Wed Jan 09, 2013 10:30 pm
- evers
- Mini-Con
- Posts: 16
- Joined: Sun Oct 24, 2010 3:10 pm
Re: Transformers Workshop (Maintenance & Repair)
Posted by evers Wed Jan 09, 2013 10:31 pm
- evers
- Mini-Con
- Posts: 16
- Joined: Sun Oct 24, 2010 3:10 pm
Re: Transformers Workshop (Maintenance & Repair)
Posted by leakin' lubricant Wed Jan 16, 2013 5:40 am
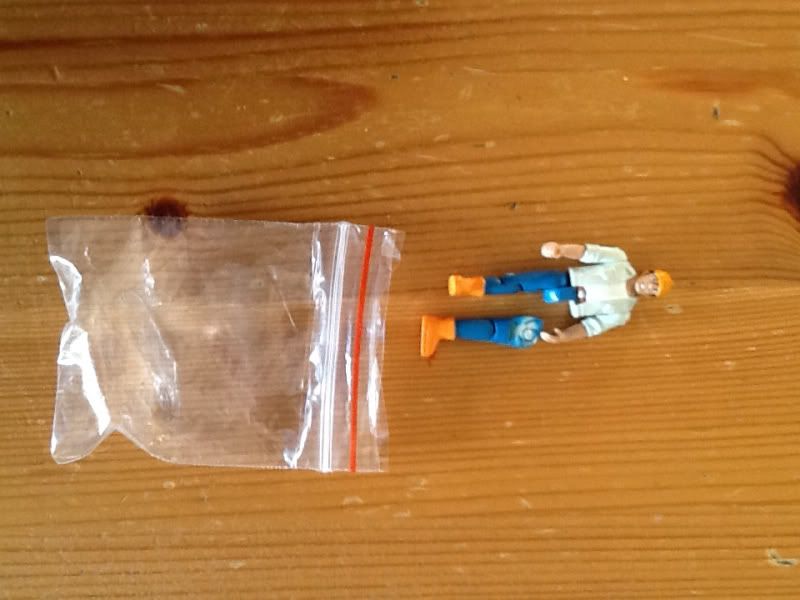
Is there any way to fixt his and keeping his articulation? I have tried popping out the snapped nub where the leg connects but it is in too tight (probably the root of the problem) any help would be appreciated.

-

leakin' lubricant - Godmaster
- Posts: 1722
- News Credits: 1
- Joined: Fri Jan 18, 2008 5:44 pm
- Strength: 5
- Intelligence: 7
- Speed: 5
- Endurance: 10
- Rank: 3
- Courage: 8
- Firepower: 7
- Skill: 9
Re: Transformers Workshop (Maintenance & Repair)
Posted by rpetras Sat Jan 19, 2013 12:57 am
amtm wrote:I have an MP-04 Optimus Prime with a broken trailer hitch piece. I also have a regular Hasbro Masterpiece Prime with an intact trailer hitch piece, but the rest of the toy is in rough shape (missing head and several pistons, beat-up paint).
I was thinking of trying to replace the broken hitch on MP-04 with the one from the Hasbro edition, but could not figure out how to get the pin holding it in out--needlenose pliers and such have not worked, and I don't want to risk breaking it by using brute force. I've attached pics of the pin on the Hasbro version (a little fuzzy, sorry).
Anyone have any ideas on how to remove it (and of course, install into the other toy) without damaging the leg where it's seated, or trailer hitch?
Get a VERY small nail, nip off the point to make it flat and use that to push out the pin.
The ends of the pins are typically different. One has a pattern cut in to help it grip in the plastic, the other is typically smooth. You want the end with the patter to pop out first, if not you will be trying to push that part all the way through the joint which is difficult to do.
Once you get that one end out you can usually grab the pin with the pliers.
This trick works for any pin joint where you can reach both sides of the pin.
Classics Magnus/Skywarp 2 pack MIB
Classics Devastator MIP
HA Sideswipe K-Mart exclusive color Loose
Currently looking for:
ROTF Target exclusive Sideswipe from the 2-pack
TFCC Punch/Counterpunch
Alternity Primes, silver & white versions
(opened is OK, to be used for customs)
PM If interested
-

rpetras - City Commander
- Posts: 3475
- News Credits: 1
- Joined: Tue Jan 30, 2007 3:28 pm
- Strength: 9
- Intelligence: 9
- Speed: 4
- Endurance: 7
- Rank: 3
- Courage: 7
- Firepower: 8
- Skill: 10
Re: Transformers Workshop (Maintenance & Repair)
Posted by rpetras Sat Jan 19, 2013 1:10 am
leakin' lubricant wrote:Have just received Dr Wu Partners through the post and on opening I noticed Sparkplugs leg is broken
Is there any way to fixt his and keeping his articulation? I have tried popping out the snapped nub where the leg connects but it is in too tight (probably the root of the problem) any help would be appreciated.
First, see if you can send him back and get the retailer to replace him ... that is your best bet. but if you can't,, one trick I've used to make replacement joints for figs is this:
Get a piece of wire about the diameter of the peg, maybe less.
You'll kind of have to judge what gauge to use.
I don't have the Dr Wu fig in question so I don't know how little he is.
But drill out a hole in the body, as well as the replace the broken peg. Use a drill bit the same size or just a TINY bit smaller than your wire.
It is a small fig, so be careful. You can probably drill it out with just the bit, without using an actual drill.
Cut a piece of wire to replace the old peg.
Viola! New pin joint. It'll hold in place with friction.
I've often used the wire that ties the figures in the packages.
Not the new eco friendly junk, the older plastic wrapped wire.
If you need to you can glue in one end, and have at least one side solidly mounted.
So if you have old packaging laying around, you probably have wire.
I've used this trick to replace many wrist pegs as well as other simple joints on TFs, Joe scale figures and Marvel Legends.
Classics Magnus/Skywarp 2 pack MIB
Classics Devastator MIP
HA Sideswipe K-Mart exclusive color Loose
Currently looking for:
ROTF Target exclusive Sideswipe from the 2-pack
TFCC Punch/Counterpunch
Alternity Primes, silver & white versions
(opened is OK, to be used for customs)
PM If interested
-
rpetras - City Commander
- Posts: 3475
- News Credits: 1
- Joined: Tue Jan 30, 2007 3:28 pm
- Strength: 9
- Intelligence: 9
- Speed: 4
- Endurance: 7
- Rank: 3
- Courage: 7
- Firepower: 8
- Skill: 10
Re: Transformers Workshop (Maintenance & Repair)
Posted by Nemesis Maximo Sat Jan 19, 2013 9:02 pm
Burn wrote:And this is for taking Nemesis Maximo seriously.
*high fives Silly in the face*
-

Nemesis Maximo - Gestalt
- Posts: 2662
- Joined: Tue Dec 25, 2012 12:59 am
- Location: Northern Lower Michigan
- Alt Mode: Lounge Lizard
- Strength: 8
- Intelligence: 8
- Speed: 5
- Endurance: 6
- Rank: 5
- Courage: 10
- Firepower: 10+
- Skill: 7
Re: Transformers Workshop (Maintenance & Repair)
Posted by leakin' lubricant Sun Jan 20, 2013 4:05 am
rpetras wrote:leakin' lubricant wrote:Have just received Dr Wu Partners through the post and on opening I noticed Sparkplugs leg is broken
Is there any way to fixt his and keeping his articulation? I have tried popping out the snapped nub where the leg connects but it is in too tight (probably the root of the problem) any help would be appreciated.
First, see if you can send him back and get the retailer to replace him ... that is your best bet. but if you can't,, one trick I've used to make replacement joints for figs is this:
Get a piece of wire about the diameter of the peg, maybe less.
You'll kind of have to judge what gauge to use.
I don't have the Dr Wu fig in question so I don't know how little he is.
But drill out a hole in the body, as well as the replace the broken peg. Use a drill bit the same size or just a TINY bit smaller than your wire.
It is a small fig, so be careful. You can probably drill it out with just the bit, without using an actual drill.
Cut a piece of wire to replace the old peg.
Viola! New pin joint. It'll hold in place with friction.
I've often used the wire that ties the figures in the packages.
Not the new eco friendly junk, the older plastic wrapped wire.
If you need to you can glue in one end, and have at least one side solidly mounted.
So if you have old packaging laying around, you probably have wire.
I've used this trick to replace many wrist pegs as well as other simple joints on TFs, Joe scale figures and Marvel Legends.
Thanks for the advice, much appreciated, I managed to get the nub out and repair it with super glue, the leg snapped back in place after a bit of careful cutting with a craft knife. If the joint breaks again I will try your method.
-
leakin' lubricant - Godmaster
- Posts: 1722
- News Credits: 1
- Joined: Fri Jan 18, 2008 5:44 pm
- Strength: 5
- Intelligence: 7
- Speed: 5
- Endurance: 10
- Rank: 3
- Courage: 8
- Firepower: 7
- Skill: 9
Re: Transformers Workshop (Maintenance & Repair)
Posted by Thequietone Thu Feb 07, 2013 1:35 am
- Thequietone
- Mini-Con
- Posts: 5
- Joined: Tue Jan 08, 2013 9:58 am
Re: Transformers Workshop (Maintenance & Repair)
Posted by Antron Wed Mar 13, 2013 10:22 am
I recently acquired and extra Alternators Skids. I know the guy's been modded to here and back but it's my only duplicate so I want to re-paint him and maybe switch his head.
What should I use to take off the existing paint apps?
Where can I get a good sized head? Voyager class maybe?
Thanks
-

Antron - Minibot
- Posts: 148
- News Credits: 1
- Joined: Tue Nov 02, 2004 12:21 pm
- Location: Northwest Ohio
- Strength: 7
- Intelligence: 9
- Speed: 8
- Endurance: 9
- Rank: 10
- Courage: 10+
- Firepower: 8
- Skill: 10+
Re:
Posted by Antron Wed Mar 13, 2013 11:23 am
Tom_Servo wrote:<img src="http://i95.photobucket.com/albums/l141/misterroundheels/MDrill.jpg" border="0" alt="Photo Sharing and Video Hosting at Photobucket"></a>
I got this drill for Christmas, and I've used it on almost every project that I've done since. It's magic.
I was reading through the old posts and saw this. Thanks for sharing. I prefer manual tools to power tools and I was thinking about getting one of these but wasn't sure about them. After hearing your praise I'm defiantly gonna pick one up.
Thanks again.
-
Antron - Minibot
- Posts: 148
- News Credits: 1
- Joined: Tue Nov 02, 2004 12:21 pm
- Location: Northwest Ohio
- Strength: 7
- Intelligence: 9
- Speed: 8
- Endurance: 9
- Rank: 10
- Courage: 10+
- Firepower: 8
- Skill: 10+
Re: Transformers Workshop (Maintenance & Repair)
Posted by Manterax Prime Mon May 13, 2013 1:56 pm
Is there any way I can fix the peg hole?
Hi-Sui-Fu-Do! Bo-Zaba-Byu-Dogon!
-

Manterax Prime - Transmetal Warrior
- Posts: 827
- News Credits: 3
- Joined: Sat Jul 11, 2009 8:44 pm
- Strength: Infinity
- Intelligence: Infinity
- Speed: Infinity
- Endurance: Infinity
- Rank: Infinity
- Courage: Infinity
- Firepower: Infinity
- Skill: Infinity
Re: Transformers Workshop (Maintenance & Repair)
Posted by leakin' lubricant Fri May 17, 2013 5:18 am
-
leakin' lubricant - Godmaster
- Posts: 1722
- News Credits: 1
- Joined: Fri Jan 18, 2008 5:44 pm
- Strength: 5
- Intelligence: 7
- Speed: 5
- Endurance: 10
- Rank: 3
- Courage: 8
- Firepower: 7
- Skill: 9
Re: Transformers Workshop (Maintenance & Repair)
Posted by Questworld12 Sun May 26, 2013 7:31 pm
I just gotten G1 Scavenger and Scapper. They are dirty and the joints are a little tight. I don't want to damage them or peal the sticker off.
What should I do to clean them?
Thanks!

-

Questworld12 - Micromaster
- Posts: 91
- Joined: Sun Feb 19, 2012 1:15 pm
- Location: IL
- Alt Mode: Telescope
- Strength: 5
- Intelligence: ???
- Speed: 5
- Endurance: 5
- Rank: 4
- Courage: 9
- Firepower: 7
- Skill: 7
Re: Transformers Workshop (Maintenance & Repair)
Posted by SKYWARPED_128 Sun May 26, 2013 8:13 pm
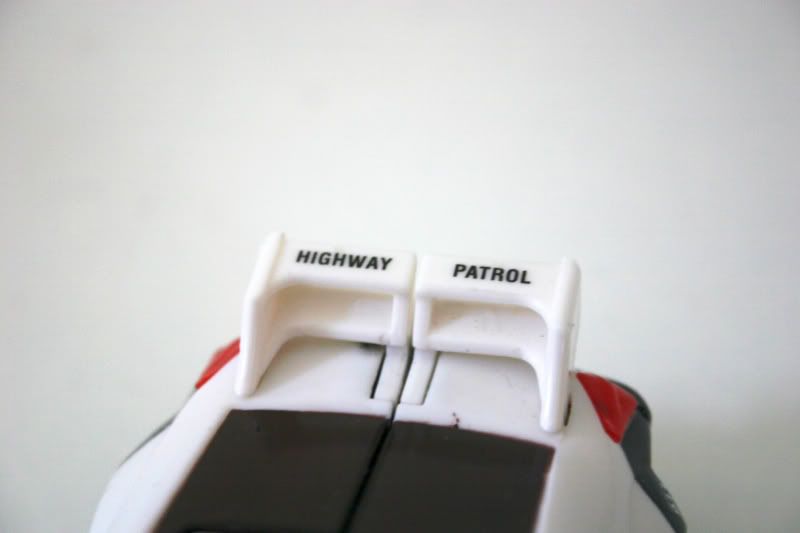
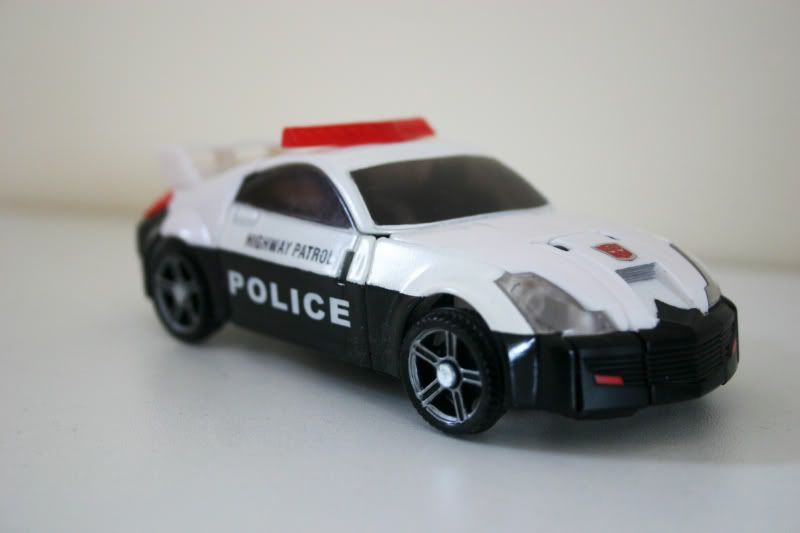
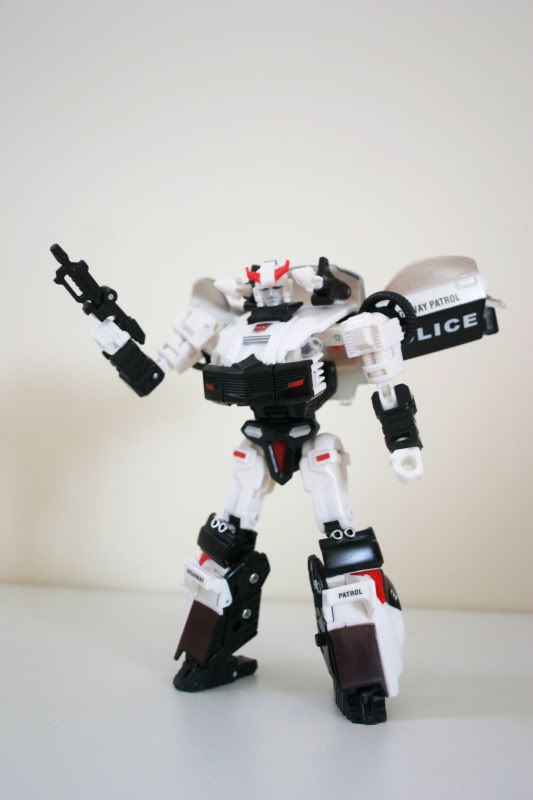
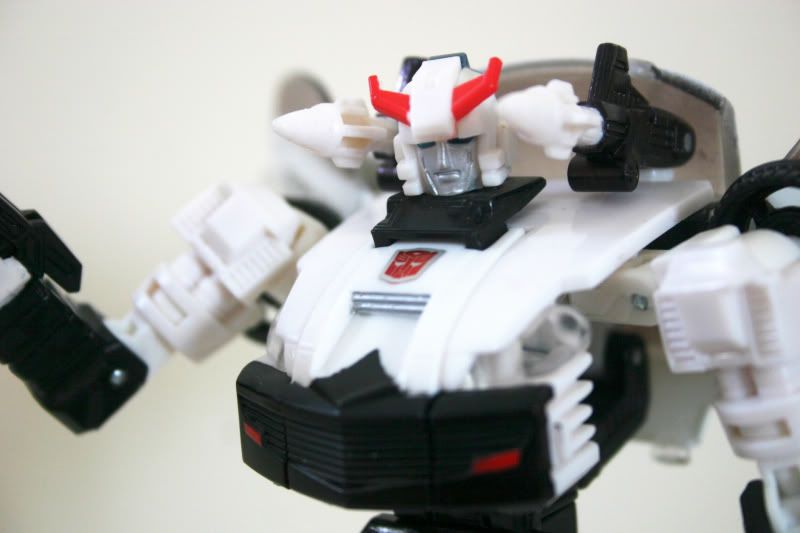
leakin' lubricant wrote:Hi all, I'm looking for some tips on fixing the paint job on my classics Prowl, for some reason all of a sudden the paint has become tacky (it was fine up until now). I was going to use Plastikote spray paints to replace the dodgy Hasbro stuff, has anyone any tips on the best way to mask off the doors with minimal bleeding, also does anyone know if it is advisable to clear cote over reprolabels sticker to preserve them.
Use Tamiya's masking tape. It might be expensive, but the masked edges show no bleed-through at all.
Do you have an airbrush? Airbrushes put on a much finer mist of paint, minimizing bleed-through. Also, try spraying from the side of the masked part--meaning, spray with the masked side facing toward you. The logic behind this is that if you spray with the unmasked side facing you, the masked edge of the tape acts like a dam, pooling paint on the edge, creating the risk of bleeding and an unnaturally thick border.
Also, you should use a blade to cut along the edges of the masking tape. Apparently, lint and dust might get stuck onto the sides of the tape, and create an uneven border on the painted surface.
- SKYWARPED_128
- Gestalt
- Posts: 2837
- News Credits: 1
- Joined: Tue Jun 23, 2009 8:20 pm
- Strength: Infinity
- Intelligence: 9
- Speed: Infinity
- Endurance: 10+
- Rank: 9
- Courage: 10
- Firepower: Infinity
- Skill: 10+
Re: Transformers Workshop (Maintenance & Repair)
Posted by leakin' lubricant Mon May 27, 2013 2:41 am
SKYWARPED_128 wrote:leakin' lubricant wrote:Hi all, I'm looking for some tips on fixing the paint job on my classics Prowl, for some reason all of a sudden the paint has become tacky (it was fine up until now). I was going to use Plastikote spray paints to replace the dodgy Hasbro stuff, has anyone any tips on the best way to mask off the doors with minimal bleeding, also does anyone know if it is advisable to clear cote over reprolabels sticker to preserve them.
Use Tamiya's masking tape. It might be expensive, but the masked edges show no bleed-through at all.
Do you have an airbrush? Airbrushes put on a much finer mist of paint, minimizing bleed-through. Also, try spraying from the side of the masked part--meaning, spray with the masked side facing toward you. The logic behind this is that if you spray with the unmasked side facing you, the masked edge of the tape acts like a dam, pooling paint on the edge, creating the risk of bleeding and an unnaturally thick border.
Also, you should use a blade to cut along the edges of the masking tape. Apparently, lint and dust might get stuck onto the sides of the tape, and create an uneven border on the painted surface.
Thanks very much, kind of a novice at this so your advice is very welcome. I dont have an airbrush unfortunately too expensive for how little I would use it. Would you advise using clear coat over the top of reprolabels or would that screw them up.
-
leakin' lubricant - Godmaster
- Posts: 1722
- News Credits: 1
- Joined: Fri Jan 18, 2008 5:44 pm
- Strength: 5
- Intelligence: 7
- Speed: 5
- Endurance: 10
- Rank: 3
- Courage: 8
- Firepower: 7
- Skill: 9
Re: Transformers Workshop (Maintenance & Repair)
Posted by SKYWARPED_128 Mon May 27, 2013 5:36 am
leakin' lubricant wrote:SKYWARPED_128 wrote:leakin' lubricant wrote:Hi all, I'm looking for some tips on fixing the paint job on my classics Prowl, for some reason all of a sudden the paint has become tacky (it was fine up until now). I was going to use Plastikote spray paints to replace the dodgy Hasbro stuff, has anyone any tips on the best way to mask off the doors with minimal bleeding, also does anyone know if it is advisable to clear cote over reprolabels sticker to preserve them.
Use Tamiya's masking tape. It might be expensive, but the masked edges show no bleed-through at all.
Do you have an airbrush? Airbrushes put on a much finer mist of paint, minimizing bleed-through. Also, try spraying from the side of the masked part--meaning, spray with the masked side facing toward you. The logic behind this is that if you spray with the unmasked side facing you, the masked edge of the tape acts like a dam, pooling paint on the edge, creating the risk of bleeding and an unnaturally thick border.
Also, you should use a blade to cut along the edges of the masking tape. Apparently, lint and dust might get stuck onto the sides of the tape, and create an uneven border on the painted surface.
Thanks very much, kind of a novice at this so your advice is very welcome. I dont have an airbrush unfortunately too expensive for how little I would use it. Would you advise using clear coat over the top of reprolabels or would that screw them up.
Glad to help.
I've clear coated Gundam stickers before when building my MG Gundam Exia, and it looks fine even a year later, so I suppose it should be okay with Reprolabels.
I haven't used Reprolabels before TBH, so I can't say for certain. It SHOULD be okay, though, as there hasn't been any reported cases of stickers being damaged by clear coats.
Just be very sure you have your sticker(s) where you want it before applying a clear coat, because it can be very difficult to remove dried clear coat , if not downright impossible (unless you're using Future).
- SKYWARPED_128
- Gestalt
- Posts: 2837
- News Credits: 1
- Joined: Tue Jun 23, 2009 8:20 pm
- Strength: Infinity
- Intelligence: 9
- Speed: Infinity
- Endurance: 10+
- Rank: 9
- Courage: 10
- Firepower: Infinity
- Skill: 10+
Re: Transformers Workshop (Maintenance & Repair)
Posted by leakin' lubricant Mon May 27, 2013 6:28 am
SKYWARPED_128 wrote:
Glad to help.
I've clear coated Gundam stickers before when building my MG Gundam Exia, and it looks fine even a year later, so I suppose it should be okay with Reprolabels.
I haven't used Reprolabels before TBH, so I can't say for certain. It SHOULD be okay, though, as there hasn't been any reported cases of stickers being damaged by clear coats.
Just be very sure you have your sticker(s) where you want it before applying a clear coat, because it can be very difficult to remove dried clear coat , if not downright impossible (unless you're using Future).
Thanks again, good advice, I should be getting the paints together later today so I'll let you know how it goes.
-
leakin' lubricant - Godmaster
- Posts: 1722
- News Credits: 1
- Joined: Fri Jan 18, 2008 5:44 pm
- Strength: 5
- Intelligence: 7
- Speed: 5
- Endurance: 10
- Rank: 3
- Courage: 8
- Firepower: 7
- Skill: 9
Re: Transformers Workshop (Maintenance & Repair)
Posted by Prankmeister Tue Jun 11, 2013 11:31 pm
http://www.pledge.com/en-US/Products/Pa ... inish.aspx
Every online link I go to redirects to this product, and even though I'm positive I ordered Pledge Future, with the product image even having the Future logo on it, this is what I got instead. Is this the same stuff with a different name, or am I missing something?
Thanks in advance! Sorry if this is on the wrong place, the maintenance thread seemed like the best place for it.
- Prankmeister
- Micromaster
- Posts: 80
- Joined: Thu Nov 29, 2007 4:10 pm
Re: Transformers Workshop (Maintenance & Repair)
Posted by Afterlife07 Sun Jun 30, 2013 3:31 am
Does anyone know how to remove this pin in Generations FOC Grimlock's shoulders?
I've tried heating it up with a hair dryer, I've tried using a hammer and a nail to knock out the pin (the gnarled end is on the top I think, which makes knocking it out tougher).
Anyone have an advice on this one?
- Afterlife07
- Mini-Con
- Posts: 17
- Joined: Fri Apr 14, 2006 4:27 am
- Location: Los Angeles, CA
- Alt Mode: Motorcycle
- Strength: 6
- Intelligence: 9
- Speed: 7
- Endurance: 10
- Rank: 9
- Courage: 8
- Firepower: 5
- Skill: 10+
Re: Transformers Workshop (Maintenance & Repair)
Posted by leakin' lubricant Fri Jul 12, 2013 5:36 am
Enjoy.
-
leakin' lubricant - Godmaster
- Posts: 1722
- News Credits: 1
- Joined: Fri Jan 18, 2008 5:44 pm
- Strength: 5
- Intelligence: 7
- Speed: 5
- Endurance: 10
- Rank: 3
- Courage: 8
- Firepower: 7
- Skill: 9
Re: Transformers Workshop (Maintenance & Repair)
Posted by magnusalpha Sun Aug 18, 2013 2:15 am

-

magnusalpha - Fuzor
- Posts: 243
- Joined: Sun Jun 07, 2009 2:18 am
- Location: Portland, OR
Re: Transformers Workshop (Maintenance & Repair)
Posted by magnusalpha Sun Aug 18, 2013 2:17 am
kirbenvost wrote:Ouch, that's a harsh break to have on an exclusive toy.So far I haven't had much luck using superglue on any sort of stressed areas of plastic... it works fine for cosmetic fixes (side mirrors, head crests, etc), but anything under stress like a joint, the glue just snaps right off. I dunno, maybe I'm doing it wrong or something. Could be I need to let it cure longer. I used superglue on one of the armor tabs on my G1 Jetfire, and it broke the first time, but is holding so far the second.
Maybe you could rig up something more permanent as a splint. Tape may leave a residue on the plastic, you could perhaps try some of the clear elastics they use in the Hasbro packaging.
I bummed me out that the knee broke off right out of the box, still does bum me out, but I did resolve it, in a way.
I never did fix this problem or find any possible solutions online. He's been hiding out in one of my air-sealed containers in the back office. Today I came across another Fire SL Convoy online & bit the $120 bullet. The completist in me wants to have that perfect condition Fire SL Convoy.
Now that I've got him on the way, I can actually handle the 1st one without crying. Rather than mess with the new one & hope the "fragile knee join" problem comes up again, I'll just continue to splint Mr. Limpy without worrying about hurting him further.
-
magnusalpha - Fuzor
- Posts: 243
- Joined: Sun Jun 07, 2009 2:18 am
- Location: Portland, OR
Re: Transformers Workshop (Maintenance & Repair)
Posted by magnusalpha Tue Aug 20, 2013 5:29 pm
Yesterday my Planintum Edition Optimus Prime came in (Super-class Energon Optimus mold). He's a great figure, especially since I'm used to my Deluxe-class SL Grand Convoy. The only problem he seems to have is that the ratchet in his left shoulder doesn't seem to have very much resistance/torque to it.
I'm not 100% how the ratchet functions but it seems like there's a spring in there pushing the teeth together. Any advice or input about putting in a new spring, things to watch out for when unscrewing things to get inside, etc.
-
magnusalpha - Fuzor
- Posts: 243
- Joined: Sun Jun 07, 2009 2:18 am
- Location: Portland, OR
Re: Transformers Workshop (Maintenance & Repair)
Posted by Fires_Of_Inferno Wed Oct 16, 2013 2:48 pm
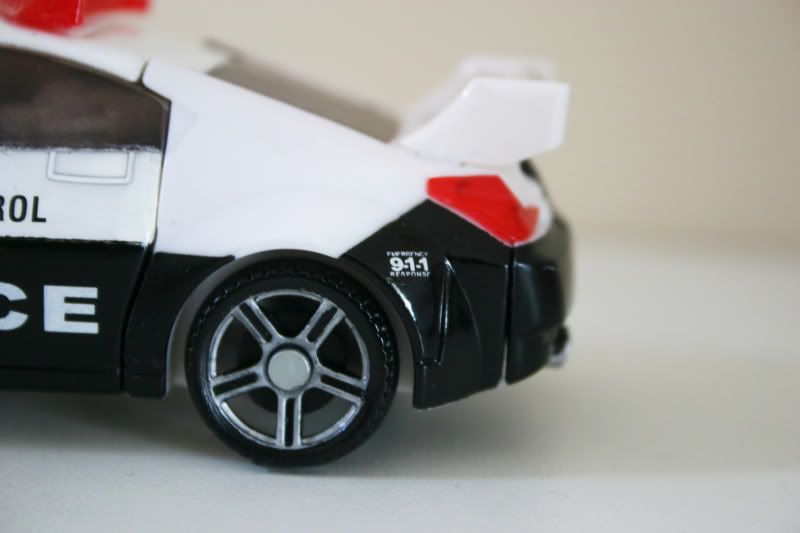
Also: is there any good solid glues that would work with that plastic? I got him cheap because the roof/windshield part was snapped off and I've been trying to glue it back on, but the Instant Krazy Glue I got isn't working out.
-

Fires_Of_Inferno - Faction Commander
- Posts: 4119
- News Credits: 20
- Joined: Wed Nov 08, 2006 9:34 pm
- Location: Edmonton, Alberta. Canada
- Alt Mode: Transmetal Insect and Helicopter
- Strength: 4
- Intelligence: 6
- Speed: 3
- Endurance: 9
- Rank: 1
- Courage: 7
- Firepower: 3
- Skill: 7
Who is online
Registered users: Apple [Bot], Bing [Bot], ChatGPT [Bot], Glyph, Google Feedfetcher, MSN [Bot], OpenAI [Bot], ThunderThruster, Yahoo [Bot], Yandex [Bot]