Mogwai Prime wrote:Change 132
You can post your alts in here again! Thanks to GreenLantern of Cybertron's insight I can now grab images from here without any issues.
Thanks MP
Requirements:
1. Please remove any faction symbols from the graphic.
2. Post submitted graphics in this thread.
3. Submit as many as you like! If they don't make in this release, they might make it in future expansions.As most of you know, Moggy has decided he wants something a bit more colorful than the 1982 ZX-Spectrum graphics we have currently, so we've decided to up the ante on the altmodes making them larger and more detailed (this 2009 after all!) Whats more, we've also decided to add
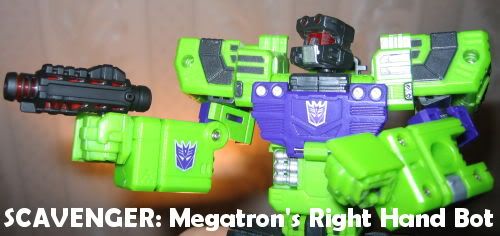
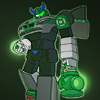
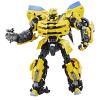
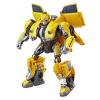
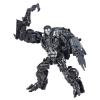
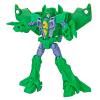
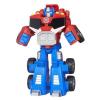
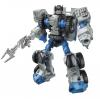
robot modes,
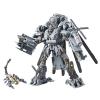
weapons and
armorinto the mix as well.
So, to put it simply: If there is an alt, robot mode, weapon or eve a piece of armor you want in the game, please make an icon for it using the instructions below (now with Youtube tutorial video's!!!) and add it here along with its name and where you got the picture from. The staff will then add it into the game in depending on its suitability and how early Burn had to get up that morning.
Using the below instructions, I was able to make these 2 alts as an example:
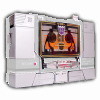

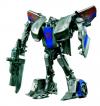
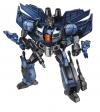
Soundwave -
http://www.seibertron.com/transformers/ ... ve/21/1/0/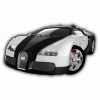

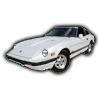
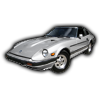
Bugatti Veyron -
http://blogs.sun.com/bigadmin/resource/ ... veyron.jpgThe first thing you'll notice is that they both look very 'grey'. This is because they are formatted so they can be custom coloured like the ones we have now just in much greater detail, so this is how they should look when done correctly.
With a bit of practice its quite simple. I made these on PaintShopPro 10 in about 10-15 mins. per alt, and its pretty much the same on Photoshop, and so if you have any problems we'll be on hand to answer them.
Feel free to have a go - and try some robot modes too!
Ill try and get an example of a robot mode up tonight for you...
Enjoy!
-------------------------------------------------------------------
Altmode/Robotmode/Weapon/Armor/Special Equipment Video Walkthrough
Step 1:
Open Image in Art Program
Step 2:
Select all background imagery that isn't going to be a part of the altmode. I do this using the "Magic Wand" selection tool that let's me select by color, hue, traditional or other choices. I make sure to go over the image to make sure I am selecting any background imagery that shows through holes or spaces that should be see through.
Step 3:
Invert selection so that the image I want to keep is what is now selected.
Step 4:
Copy selection and paste as a new image. This gives me the image I want to save as the alt on a clean transparent background and makes the image on as small of a canvas as possible.
Step 5:
Select all the background area again and create a new raster layer. Highlight the new layer and fill in the selected area with the HMW page background color
Hex Code: FDFDFD. Then clear the selection.
Video Walkthrough Steps 1 through 5Step 6:
Using selection tool of your choice select either the what you will choose to be the main color or the details. Once selected goto EDIT and CUT. Then Paste as a new selection. Move the selection till it is positioned where it was before you cut it out. Once placed, promote the selection to a layer.
Video Walkthrough Step 6Step 7:
Clear the selection. The change to the main color layer and change it to black and white. (Check the different color filters so that you can fine the lightest conversion). Then go to the properties of the main color layer and change the transparency to 40%. The rest of the video is me making a new layer to test for color. I recommend doing this to make sure it is going to look right.
Video Walkthrough Step 7Step 8:
Resize the image to 90 pixels at it's widest dimension. Then change the canvas size to 100x100 pixels being sure to keep the image centered. Then fill in the background of the newly created canvas with the background color.
Then change to the background layer and select the transparent area. Create a drop shadow on a new layer with a blur of 5.00. Change to the drop shadow layer and perform the same drop shadow four more times making sure that new layer is unchecked for the last four. Then move the layer so that it is on top of the background layer. And, clear the selection.
Video Walkthrough Step 8Step 9:
I used the color layer I made for testing to check various colors. I do this to make sure it's going to look ok with the different colors.
Then delete the color test layer.
Export the image with the PNG tool and name it with "100" at the end.
Resize the image to 50x50 and Export again with the PNG tool and do the same name with "50" at the end instead of "100".
Video Walkthrough Step 9The small print:
Not all icons etc. submitted will make it into the first, or subsequent, releases for various reasons which will be explained by the staff where possible. If using a copyrighted image, please list the source material and location of the original image to allow the staff to check if it can be used. The HMW staff totally wholly the right to select images submitted on a 'relevance to the game' basis and any icons etc. used will be credited to the submitter wherever possible.So, there you go... Questions?