Fixes for Transformers Animated Figures!
Thursday, June 12th, 2008 1:35AM CDT
Categories: Toy News, Site ArticlesPosted by: Hotrod Views: 63,184
Topic Options: View Discussion · Sign in or Join to reply
First, if you have a complaint, contact Hasbro with this form: http://hasbro.custhelp.com/cgi-bin/hasb ... BfcGFnZT0x
I get a response from them every time and have talked to them about subjects from loose joints to unpaintable plastic on their figures. This is how they get feedback from us, we have to do out part in telling them what's wrong. The form is easy to fill out and will only take you a few minutes.
But since you've already bought your figures it's time to fix the ones you have. Some pictures are supplied below the fixes for you as well. These are the fixes that worked with my figures.
Loose Ball Joints
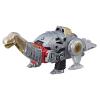
These are easy to fix. First, pop the offending limb off. In the case of Grimlock, Prime, megatron, they all have balljointed sections. Now take your superglue and drip just a little but on the ball-post, not inside the cup. Spread it around a bit and do NOT put it back in. Let the superglue cure, let it sit there or hit it with a hairdryer until it forms a nice shiny, hard shell. Reattach it. This fixed my Grimlock, 2-pack Prime and Megatron's hips, and Prowl's shoulders.
It should work for almost any figure unless the ball post is made of the dreaded unpaintable plastic! Then you do what do is drip the superglue on the ball post and put it in the cup while it's still wet! Since the ball post is made of the special plastic, the superglue won't adhere to it, but just the cup inside, making a tighter fit. Just gently move the limb loose after it cures. But be careful, make sure the ball-post is made of the unpaintable plastic, not clear like Megatron's. Black Arachnia's mandibles are a good example of what unpaintable plastic is, also the kind that's used for the inner disc of a Marvel Legends shoulder or hip joint. Kinda waxy and tough plastic.

Loose swivel/cut-joints
These can be a little more difficult. Starscream has them in his thighs, so does Voyager megatron. They like to pop out because the ratchet system (not the character, the clicking noise, heh) is stronger than the cut joint-plug. The fix can be done two ways, sometimes one works and other times the next works. Fix 1 is to do the superglue trick as described in the tightening ball-joints. Take the cut joint apart and apply a thin layer of superglue to the end of the peg where the ridge is. Usually this is towards the top of the peg, sometimes the center. Let the superglue cure then pop it back into place. This usually tightens the joint up enough so it doesn’t pop out.
If this doesn’t work or the sections are made of UP, then you’ll have to do the Burning-Blade technique. Sounds dangerous eh? It can be, what you want to do is heat up the end of your x-acto knife with a lighter or use a soldering Iron and touch the end of the peg, melting it slightly and making it wider. Some people cut an ‘X’ into the top with the heated blade, this flaring it out some that way. I had to do this with Starscream’s right leg because it kept falling off.
The last-ditch effort is to drill a hole in both ends, then drive a screw into one end. Clip the head of the screw off and then ‘screw on’ the opposite part until they become one piece. Unless you turn the part more than 360 deg, it will stay together that way.

Crappy Paint
Ah, you’ll have to touch up your figures by hand to combat this problem. I recommend Testors Model Master Acrylics. I use the Fantasy line and their regular Acrylic line. Head to their site and click on the Model Masters banner to be taken to this page: http://testors.com/brand_category.asp?brandNbr=4 There you can view the Color Charts and see what shades you need to match. Depending on your monitor colors you may need to adjust the shade of paint when you get it, so I buy some white, black, gray, and a few other colors to mix with my paints to obtain different shades. Like for Grimlock’s gray I had to use Gunship Gray mixed with some Bear Brown to get that shade. His red needed Dragon Red lightened slightly with some white, or Rust mixed with some Bloode Red.
Loose hinge Joints
This requires a bit more finesse. Most of the voyager figures have clicky hinge joints in their knees, elbows, shoulders, etc. But then there’s the case of just a regular hinge without the clicky. Sometimes those are loose and you’ll need a superglue trick to fix them. It’s easy, drip some superglue in the hinge and wait 5 seconds, then move it. Wait a little longer, move it slightly again. Keep messing with it so it doesn’t completely set up but slowly starts getting tighter. After about 2-3 minutes the joint will be much tighter. Repeat as needed.
Grimlock’s slide-in arm fix
Welcome to the advanced class! This takes a few more steps. First, pop off Grimmys leg and unscrew all three screws. You’ll have to pop the thigh apart with a tad bit of effort because there’s still a peg or two holding it together.
Once you have the leg apart, look at the end of the black arm section. There’s two spinny sections. Those sections slide in the groove. Take your hobby knife and carefully shave the back of it into a slant, leaving the front to remain flat so it will stop the arm from coming out.
Next take your Dremel tool or something you can scrape plastic out with and shave inside the groove that’s in the thigh. Remember how his thigh bulged out when you pressed the leg in? We’re shaving the inner sides to give that black piece of plastic more room. I suspect you could skip this and just shave the black spinner sections lower but I didn’t want to risk the arm being pulled out because that got too thin.
Now test fit it together. Grimlock’s arm now moves all the way in!

Ok, hope that helped with a lot of the fixes. Remember this is just a guide and your results may vary depending on your tools and skill level. These worked for my figures and now everything stays tight and together on my figures. More fixes to come as I figure them out. Know of a problem that wasn’t listed? Email me at jinsaotome@hotmail.com, I’ll pick up the figure and post a fix when I have time. Thanks for reading!
Here’s the fixes for the range of motion on Prowl’s knees, Lockdown’s hands, and Bumblebee’s stingers. Props to the people who came up with any of these fixes first! I believe Prowl’s knee fix was posted somewhere here so I’m basically just adding pictures.
Lockdown’s Hands
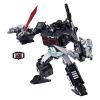
Poor Lockdown has funky wrists, his hands don’t fold out all the way. Snag your Dremel tool or Hobby Knife and cut a square out of the bottom portion of his hand as shown in the pic. If you just have a hobby knife you’ll need to score at it over and over until you can dig it out. I used the tip of a mini-screwdriver to help. Do it right and his hand will gain full-fold-out range

Bumblebee’s Stingers
They don’t fold in all the way and look funny sticking out when he’s in robot mode. Fix this by folding the Stingers out and using your Dremel tool or hobby knife to remove the two square bits of plastic behind the post that the stingers hinge on. With those out of the way his Stingers fold all the way in when his hands are folded out.

Prowl’s knee range of motion
This is an easy fix, all you have to do is trim the bottom of the hip-pad at an angle. This allows the sides of his knees to clear the pad and get a good 90 degree angle.

News Search
Got Transformers News? Let us know here!


